

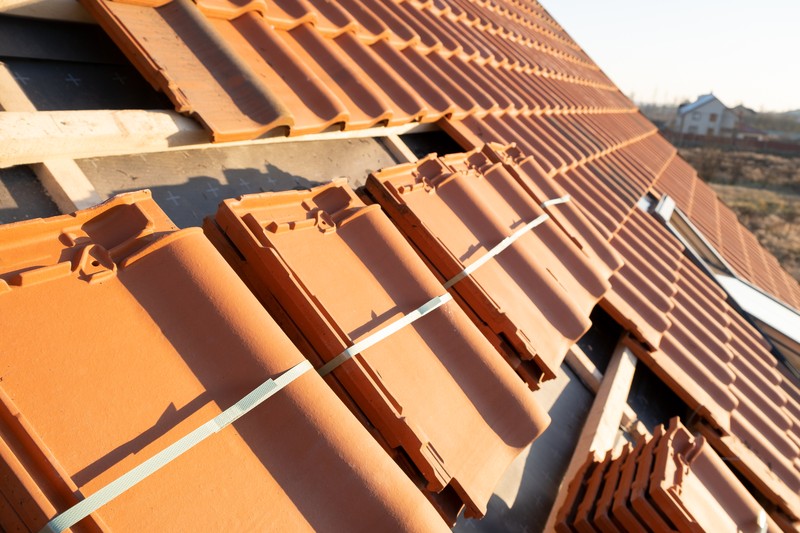
Quick Summary: Clay tile roofing can add long-term beauty, durability, and value to your home when the system is installed with the right preparation. A successful project starts with a professional roof inspection, strong decking, proper underlayment, accurate flashing, secure fastening, and careful tile layout. After installation, regular inspections, prompt repairs, and debris removal help protect the roof from South Florida heat, rain, wind, and moisture concerns.
Clay tile roofing gives your home a strong blend of beauty, durability, and long-term protection, especially in South Florida’s heat, rain, and coastal conditions. A successful clay tile roof installation depends on more than choosing the right tile style. It requires careful inspection, solid roof deck preparation, proper underlayment, accurate flashing, and secure fastening. Since every home has different roof slopes, drainage patterns, and structural needs, understanding the process helps you make better decisions before starting your roofing project and protecting your investment for years ahead.
What Makes Clay Tile Roofing a Strong Choice?
Clay tile roofing remains a strong option for homeowners who want lasting protection with a refined exterior look. Made from natural clay that is shaped and fired, these tiles can handle intense sunlight, heavy rain, and changing outdoor conditions when installed correctly. Their weight, shape, and overlap help shed water while giving the roof a distinctive style that fits many South Florida homes.
Clay tiles also offer strong fire resistance and can support better temperature control because the tile profile allows air movement beneath the surface. For homes with Mediterranean, Spanish, coastal, or custom architectural designs, clay tile can add character without looking dated. Since this material is heavier than shingles, the roof structure must be reviewed before installation begins by a trained roofing professional.
Why Clay Tile Roof Installation Starts with a Roof Inspection
Before any new tile system is planned, a professional roof inspection helps reveal what your home needs beneath the surface. During this review, the roofer checks the roof slope, decking, fascia, ventilation, drainage paths, flashing areas, and signs of moisture damage to understand how the existing structure will support the new roof. This step is especially important for clay tiles because their added weight may require wood repairs, material removal, or closer structural evaluation before installation begins.
In South Florida, valleys, roof edges, vents, chimneys, and wall connections also need careful attention because heavy rain can expose weak points quickly. A detailed inspection gives the project a clear starting point, reduces surprises during installation, and helps you understand the scope before materials, scheduling, and installation are confirmed.
Preparing The Roof Deck and Underlayment System
A strong tile roof begins with the surface that supports everything above it. After old roofing materials are removed, the roof deck must be checked for soft wood, moisture damage, uneven areas, and weak sections that could affect support for the new system. Any damaged decking should be repaired before the underlayment is installed because hidden problems can shorten the life of the roof.
The underlayment acts as the main water barrier beneath the clay tiles, so it must be placed carefully across the roof surface, edges, valleys, and transition areas. This layer carries major importance in South Florida because wind driven rain can move beneath the visible tiles during harsh weather. Proper preparation gives the tile system a stable base, helps control moisture, supports cleaner alignment, and gives installers a clear surface for fastening and finishing details.
Flashing, Fastening, and Layout Details Matter
Small installation details can have a major effect on how well a tile roof handles water, wind, and daily exposure. Flashing directs water away from vulnerable areas such as valleys, chimneys, vents, skylights, walls, and roof edges. When these transition points are shaped and sealed correctly, the roof has better protection against leaks during heavy rain.
That same level of precision also applies to fastening and layout. Each tile must be secured according to the roof design, tile type, slope, and local wind requirements because poor spacing or weak attachment can leave tiles vulnerable to shifting, uplift, or breakage. Layout planning helps each row sit evenly with the right overlap, drainage path, and visual alignment. These technical steps may look simple from the ground, but they require careful measurement, product knowledge, and trained installation methods to support long-term roof performance.
How Clay Tiles Are Installed on the Roof
Once the roof surface is fully prepared, installation usually begins near the lower edge of the roof and moves upward in organized rows. This approach helps each course overlap correctly so water can flow down the roof without being pushed beneath the tiles. Installers place the field tiles across the main roof sections, then make careful cuts around valleys, edges, vents, and other roof penetrations. Hip and ridge tiles are added along raised roof lines to complete the shape and protect exposed joints.
Careful alignment matters throughout the process because uneven rows can affect appearance, drainage, and tile stability. Each tile must also be handled with care because clay can crack when walked on or placed incorrectly. A finished clay tile roof should look balanced from the ground while carrying the hidden waterproofing, fastening, and flashing details needed for dependable protection.
Common Clay Tile Installation Problems to Avoid
A roof can develop issues when the visible tiles look finished, but the supporting details are weak beneath them. Poor underlayment placement may allow moisture to reach the deck, while weak flashing can create leaks around valleys, vents, walls, and roof edges. Loose fastening can make tiles shift during strong winds, and poor layout can affect drainage across the roof surface. Cracked tiles, uneven rows, blocked valleys, and wrong material choices may also shorten the life of the roof. Since these problems can lead to water damage, interior stains, mold concerns, and costly repairs, clay tile work should be handled by trained roofing professionals. A careful installation helps your roof stay protective, attractive, and ready for South Florida weather.
Caring For Your Clay Tile Roof After Installation
Once your new roof is in place, regular care helps preserve its appearance and performance. Schedule professional inspections after severe storms, visible impact, or signs of interior moisture. Debris should be cleared from valleys, gutters, and drainage areas so water can move away from the roof properly. Broken, slipped, or cracked tiles should be repaired promptly because exposed underlayment can age faster under sun and rain. Avoid walking on clay tiles without proper training because pressure in the wrong spot can cause breakage. Maintenance should also include flashing checks around vents, walls, skylights, and roof edges. Photos of problem areas can help your roofer understand changes between service visits. With steady attention, your clay tile roof can keep its shape, protect the home, and maintain strong curb appeal through years of South Florida weather.
Bring Lasting Value to Your South Florida Home
A well installed clay tile roof gives your home more than a beautiful exterior. It protects the structure, supports long term value, and helps your property stand up to South Florida heat, rain, and wind. Since clay tile depends on proper preparation, waterproofing, flashing, fastening, and careful handling, the quality of the installation matters as much as the tile itself. Choosing the right roofing team helps you feel confident before, during, and after the project.
At Innovative Roofing, we help homeowners with clay tile roof replacement, residential roof repair, roof inspections, and roof maintenance. Our team is state certified and fully insured, family owned and operated, and backed by more than 50 years of roofing experience. We also bring an A+ BBB rating, GAF Master Elite residential status, and over 3,000 completed roof installations to every roofing project.
Contact us today to schedule your roof inspection and talk with our team about your home.
FAQs
How long does clay tile roof installation usually take?
Clay tile roof installation timelines depend on roof size, roof shape, tear-off needs, weather, material availability, inspections, and any deck repairs found during the project. A simple replacement may move faster, while a larger or more detailed roof can take longer because clay tiles require careful layout, fastening, flashing, and finishing.
Why is underlayment important under clay tile roofing?
Underlayment is the main water barrier beneath the visible clay tiles. While the tiles help shed rain, wind driven moisture can still move beneath them during harsh weather. Proper underlayment helps protect the roof deck, reduce leak risks, and support long-term performance, especially in South Florida’s heavy rain and humidity.
Can damaged clay roof tiles be repaired instead of replaced?
Some damaged tiles can be replaced individually when the surrounding roof system is still in good condition. A professional inspection helps determine whether the issue is limited to broken tiles or connected to deeper problems such as worn underlayment, poor flashing, loose fastening, or hidden moisture damage beneath the roof surface.

